Since learning Scala and looking at new technologies, I'd parked the Swing project, described previously. It turns out that writing UI delegates is quite tedious, especially when it doesn't seem to fit in to the existing framework.
My new project is a toy application using the Play! Framework, part of the Typesafe stack. This is a Java and Scala API for web applications and it looks a lot like Rails, from the little amount I know about Rails.
My toy project is a calendar/appointment booking site and I've chosen to write it in Scala. The Play! framework also supports writing your CSS in less (www.lesscss.org) so I thought I'd give that a go too.
The first thing to notice is that Play! uses sbt heavily to control the project lifecycle; the bundled "play" executable is simply a wrapper around sbt, including additional Play! modules. This, IMO is both a blessing an a curse; in my limited experience of developing in Scala, I have always found sbt the hardest part of the learning. This was also my experience here. The thing is that a default Play! application creates a project/Build.scala project configuration file. Unfortunately, this is a different format than the build.sbt file described in all the sbt tutorials. This caused me some level of confusion when attempting to add the ScalaTest library to my project; resolved by adding a build.sbt file with a simple libraryDependencies definition:
libraryDependencies += "org.scalatest" %% "scalatest" % "1.8" % "test"
From there I was able to create a simple web page that displayed a grid, which I hope to make look like a calendar page (month view) very soon.
Monday 3 December 2012
Saturday 13 October 2012
Still here!
Sorry I've not posted for ages, my pi has been playing up a bit and I've been distracted by another side-project: a custom swing component. It's still very much in its infancy, so stay tuned for updates.
The component is a table of triangular cells; formed of rectangular cells diagonally divided into four.
It's heavily based on OpenJDK's JTable, but a lot simpler. It started as a standard JTable with a custom model and cell renderer that would group 4 elements together. However, this did not seem to provide enough power to be able to select a single triangle cell, so I decided to make the component fit the logical model more accurately. At the moment it can render a simple array-based table model, except that the model has 3 addressing dimensions; row, column and position in the cell. This causes a few complications, in that all the standard JTable methods and interfaces are built around 2 dimensional coordinates, but it's coming along... when I'm not studying Scala.
Saturday 14 July 2012
Fixing eglibc/manual Makefile rules
In my last blog, I cheated a bit, as I said that "I had to edit manual/Makefile, splitting the implicit and explicit make rules".
At the time, I hadn't actually done this, but the process was reasonably straightforward. Line 235 of manual/Makefile contained the line:
The % on the end of the third target makes it an implicit rule, whereas the other two targets are explicit (or normal). The fix was simply to duplicate the steps against separate targets; one explicit and one implicit. This is in fact how the Makefile looks in later versions of eglibc.
When I came to make install eglibc, I still encountered problems with it failing to build the manual (which I didn't want anyway). I tried downloading the source for the manual, but that didn't fix it. Instead I made another edit to the Makefile, changing the subdir_install target (line 181) to be empty (removing the "install" dependency).
Following this all built smoothly and I now have a working stage3 compiler!
At the time, I hadn't actually done this, but the process was reasonably straightforward. Line 235 of manual/Makefile contained the line:
$(objpfx)stubs ../po/manual.pot $(objpfx)stamp%:
The % on the end of the third target makes it an implicit rule, whereas the other two targets are explicit (or normal). The fix was simply to duplicate the steps against separate targets; one explicit and one implicit. This is in fact how the Makefile looks in later versions of eglibc.
When I came to make install eglibc, I still encountered problems with it failing to build the manual (which I didn't want anyway). I tried downloading the source for the manual, but that didn't fix it. Instead I made another edit to the Makefile, changing the subdir_install target (line 181) to be empty (removing the "install" dependency).
Following this all built smoothly and I now have a working stage3 compiler!
Monday 9 July 2012
A First CC
Before I start, I'd like to note that I have entirely followed the instructions from the eglibc source code, which I downloaded on my Raspberry Pi using "apt-get source eglibc".
[edit] I have since discovered that patches should then be applied by entering the eglibc-2.11.3 directory and running debian/rules patch. This required quilt to be installed (apt-get install quilt) [/edit]
From there, I used scp to copy the sources folder to my netbook, into a src folder under my home directory.
The first instruction was to set up some environment variables, which proved very useful later. I put these in a file that I could source later. Firstly, setting our aims:
export build=i686-pc-linux-gnu
export host=$build
export target=arm-unknown-linux-gnueabi
export linux_arch=arm
Next, some version information. I didn't use all of these, but it's good for reference:
export binutilsv=binutils-2.20.1
export gccv=gcc-4.7.1
export linuxv=linux-3.1.9
Finally, our environment:
export top=~/src/cross-compile/arm
export src=~/src/cross-compile/src
export obj=$top/obj
export tools=$top/tools
export sysroot=$top/sysroot
With the environment set up, I was ready to build. First up was binutils, the package of useful utilities for making C programs actually runnable (as far as I understand!). This was straightforward; I simply copied the steps from the Readme:
$ mkdir -p $obj/binutils
$ cd $obj/binutils
$ $src/$binutilsv/configure \
> --target=$target \
> --prefix=$tools \
> --with-sysroot=$sysroot
$ make
$ make install
Next up was the first gcc; the Readme says that 3 are needed. This blog post will just cover the building of the first one, as there were quite a few steps and pitfalls to cover.
I had a bit of a false start with gcc, as I started, as before, by running apt-get source gcc. To cut a long story short, this downloaded the wrong package, then I located the right package, but unpacking it failed, so I headed over to gcc.gnu.org to get the latest GCC code (4.7.1), figuring that I didn't need to match the compiler version that compiled the original libraries.
While configuring, gcc told me it needed GMP, MPFR and MPC libraries, so I had to head back to the gcc mirrors for these. Fortunately, configuring and compiling them was a doddle, just needing to specify the location of the previously built libraries while going through the list. I wasn't sure where to put the installed binaries, so I opted for a prefix of $top/i686.
$ cd $obj
$ mkdir gmp mpfr mpc
$ cd gmp
$ $src/gmp-4.3.2/configure --prefix=$top/i686
$ make
$ make install
$ cd ../mpfr
$ $src/mpfr-2.4.2/configure \
> --prefix=$top/i686 \
> --with-gmp=$top/i686
$ make
$ make install
$ cd ../mpc
$ $src/mpc-0.8.1/configure \
> --prefix=$top/i686 --with-gmp=$top/i686 \
> --with-mpfr=$top/i686
$ make
$ make install
When compiling gcc I had to enter an extra --disable-libquadmath flag to the configure script, as this was attempting to load the library (for tests) but was unable to. I guessed I could live without it. The full command was:
$ $src/$gccv/configure --target=$target \
> --prefix=$tools --with-newlib --disable-shared \
> --disable-threads --disable-libssp \
> --disable-libgomp --disable-libmudflap \
> --enable-languages=c --with-gmp=$top/i686 \
> --with-mpc=$top/i686 --with-mpfr=$top/i686 \
> --disable-libquadmath
$ PATH=$tools/bin:$PATH make
$ PATH=$tools/bin:$PATH make install
I downloaded the sources for the linux 3.1.9 sources twice, firstly from kernel.org, then from the raspberrypi project on github. To install the headers, a copy must first be made in the source directory, then the "headers_install" make target run:
$ cp -r $src/raspberrypi-linux-c47ee9d $obj/linux
$ cd $obj/linux
$ PATH=$tools/bin:$PATH \
> make headers_install \
> ARCH=$linux_arch CROSS_COMPILE=$target- \
> INSTALL_HDR_PATH=$sysroot/usr
Finally, we get to build eglibc itself. I found that I had problems building initially, with make complaining about a missing "manual" directory. This was because I hadn't applied the debian patches to the source (see the top of the post), but there was a bug with the patch against my version of make, so I had to edit manual/Makefile, splitting the implicit and explicit make rules. Once this was sorted out, it was just a case of following the instructions to build the libraries. The most interesting of these instructions was compiling /dev/null into libc.so, since, although this file is required by the build, it is never read!
... some instructions omitted, find in the eglibc source code ...
$ $tools/bin/$target-gcc -nostdlib -nostartfiles \
> -shared -x c /dev/null \
> -o $sysroot/usr/lib/libc.so
And there you have your first GCC. I'm still not entirely sure what it can do, however! The document says that the second CC will be able to build eglibc and I think the third is a full cross-compiler. The instructions look pretty straightforward, so I'll give it a go and let you know how I get on!
Friday 29 June 2012
Toolchain Adventures (pt 1)
I wanted to build a cross toolchain so I could more easily develop for my RPi on my normal development machine. I also fancy setting up a dist-cc compile farm, but my programs are certainly too small to benefit from this!
Although as a general rule I prefer Ubuntu, I have Fedora on my netbook. This may have made things more difficult to begin with, since the RPi wiki has simple-sounding instructions for installing the arm-unknown-linux-gnueabi toolchain on various distros, except Fedora. No panic, there was a similarly-named arm toolchain package, so I installed that and set about compiling and transferring my take on "hello, world". Unfortunately, when I tried to run it, all I got was "file not found". Hmm, something's not right.
Since the toolchain name didn't quite match what I wanted anyway I didn't bother apt-get installing gdb to investigate, rather I went to another tool that I'd seen mentioned: Sourcery CodeBench lite. This download ok (after being sent an incorrect link) and after installing I was a bit baffled how to build (or, more to the point, link) anything at all!
Maybe I should have spent more time trying to understand the documentation, but it sounded very low-level and it wasn't clear what the right selections were for the RPi.
Next up was crosstool-ng, a script that is meant to simplify building and configuring cross-toolchains. I'm sure I've used its predecessor, crosstool, before, so I downloaded and installed it. This time, however, I was using my wife's win2k3 machine (I'm sure she'd like me to point out that this also runs Ubuntu, but she's using some silly Windows-only application at the moment). This meant an error during the initial install, due to some cygwin incompatibility. Once that was resolved, I went through the menuconfig screens, taking defaults and random guesses until it was ready to build. It didn't take long for this to fail: during the initial sanity checks, it noticed that my filesystem was case-insensitive and that was that.
All was not lost, though. Crosstool-ng had given me a hint about what was needed for a cross-toolchain so I downloaded the source for the C libraries installed on the Raspberry Pi. Since this was a debian distro, this was just a case of:
apt-get source glibc
This had a friendly-looking readme file concerning cross compilation. With this I've had much more luck; I still haven't built my hello world program yet, but it's nearly there. I'll share my experiences with this in a subsequent post, so stay tuned!
Sunday 24 June 2012
Pi Tin
I've finally managed to take some pictures of the "case" I've made for my Pi.
 It's just a plastic tub from Ikea which came in a set. I had two size options really: a smaller one which the board fit snugly in lengthways, and this larger one where the board was diagonally positioned. If I had chosen the smaller option, any plugs would protrude, and I would have had to get the holes in exactly the right places, so I went for the roomier option. This meant I could make one large hole for the data wires in one side and a smaller one in the opposite side for power.
 The pictures aren't very good, I know, but it's on my network and I've got an SSH session on it, so I wasn't going to unplug it!
Sunday 17 June 2012
RPi Arrived, Obligatory Photos
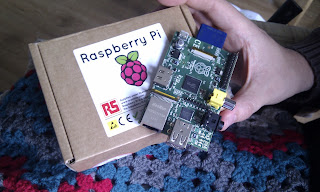
Hi, so I've got my Raspberry Pi and I thought I'd start a blog, just like everyone else who's got one. So for starters, here's the board. I'm just fashioning a case for it, which I will post later. The Pi currently has the debian6 release on it, but I downloaded the Arch Linux image too, for when I get a bit more comfortable with it.
My plans for the unit are... a bit undecided as yet; I've been trying to get to grips with Gtk before its arrival (I'm a Java dev by trade, so this was a little strange!) so I fancy getting a little GUI app on it. Otherwise I'd like to do some client-server stuff, perhaps with an Android front-end.
I'm currently in the process of building a toolchain for my (Fedora) netbook to build stuff, and that was really the reason for starting this blog; if I get anywhere with that and get some useful results I'll post them and hopefully someone else will learn from it.
So here comes the first photo: the arrival of the Raspberry Pi:

Subscribe to:
Posts (Atom)